

All of your pieces are cut, so let's get to it.
2. Sewing the body of the Teepee together
a. Cut the door

Choose one panel from your outside fabric and one panel from your lining fabric to be the front of your teepee. Measure up the fold line of the panel and place a straight pin at 34 inches up the fold. Cut up from the bottom of your panel to that straight pin for both the outer and lining fabric. This will be the door to the teepee.
b. Sew all four of your teepee outer fabric side panels together

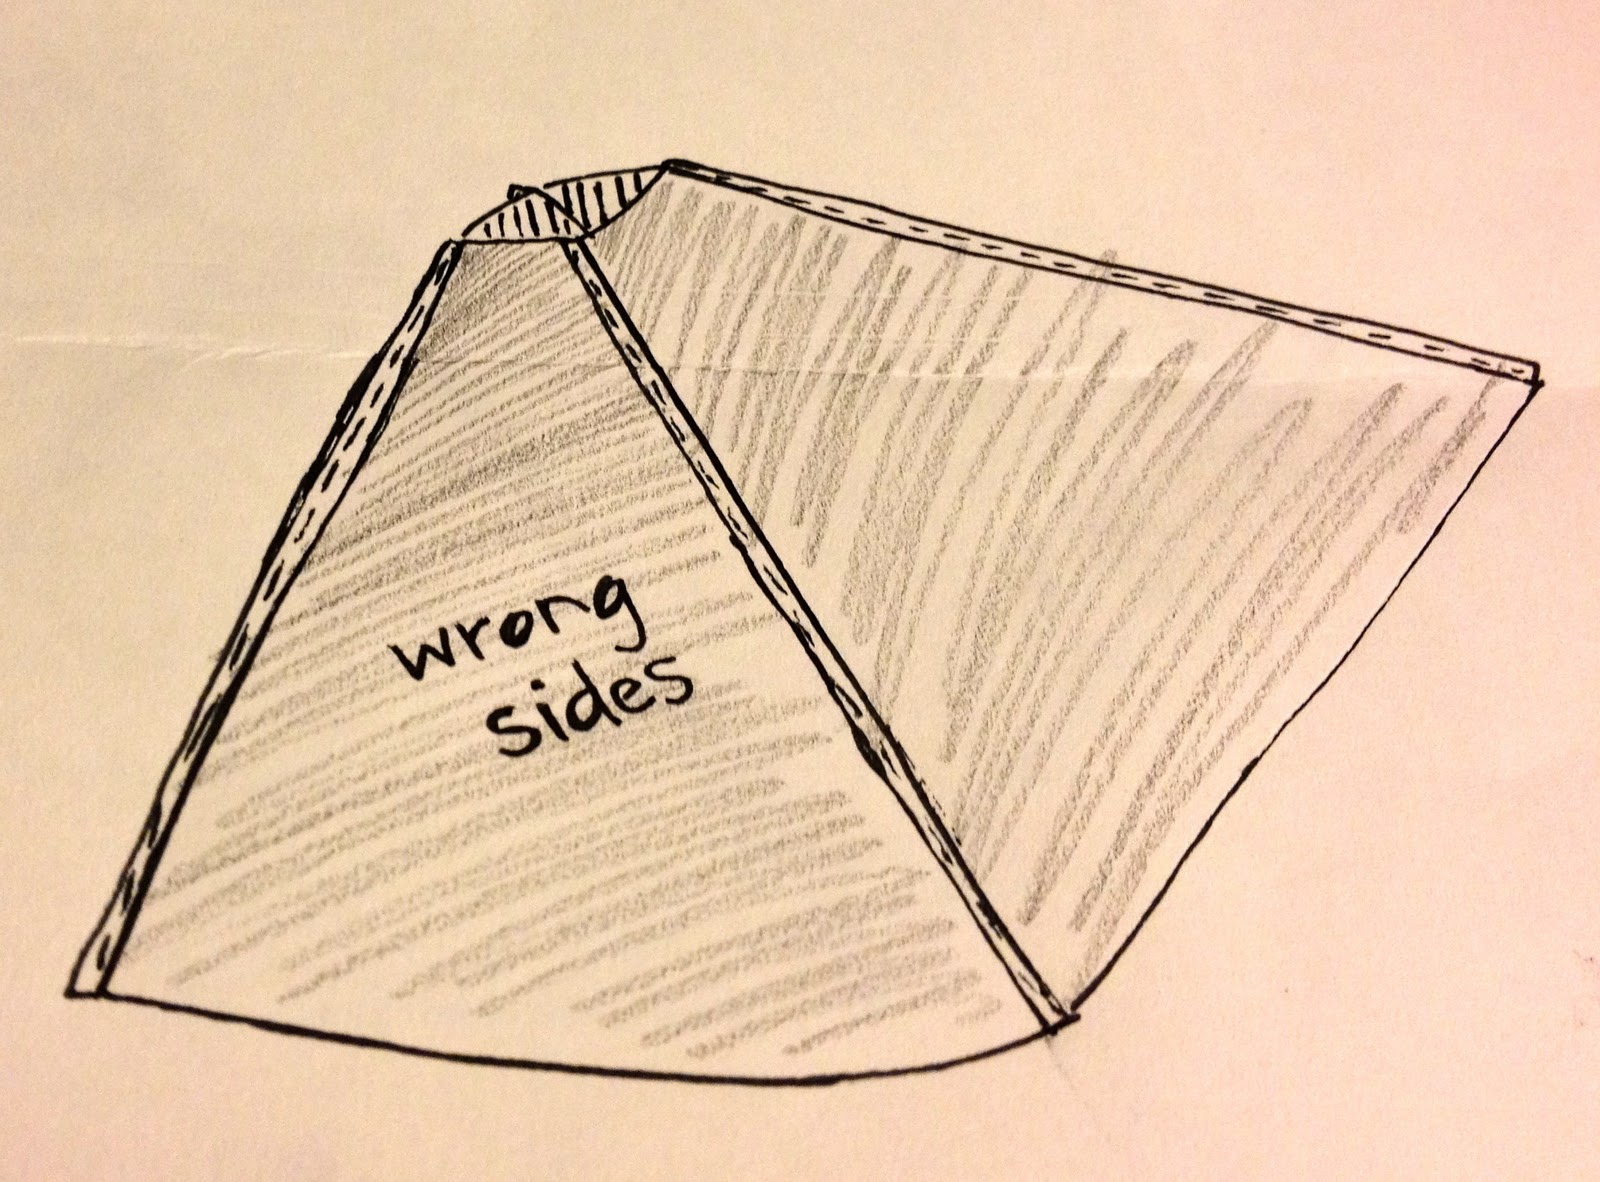
With right sides together and using a quarter inch seam allowance, sew together two of your outside panels together.

Repeat so that all four of your outer teepee panels are sewn together. Again, always make sure that the right sides of the fabric are facing each other when you are sewing your panels together. When you lay it all out after sewing all the panels together, you should see the seams on the wrong side of your fabric, as seen above.
Referring to the above diagram, sew together panel D and A in the same way, right sides facing, so that all four panels are now sewn together in a cylinder.
Iron all of the seams open or to one side, whichever you prefer.
c. Repeat the above steps for your lining fabric.
d. Sew the lining and outer teepees together at the door

Place the lining teepee inside the outer teepee with right sides together. Line up the doors. I recommend using pins to line up the door as the whole thing is pretty bulky at this point and a little difficult to menuever through the sewing machine. Sew along the door using using a quarter inch seam allowance. Trim the allowance and carefully clip the tip so that when you turn it right side out it doesn't pucker.
e. Turn the Teepee right side out

Turn the Teepee right side out. Iron the seam around the door flat and pin along the door. Loosely pin around each seam to keep the outer teepee and lining together and lined up. Sew along door with a quarter allowance. Set the Teepee aside.

Alma even loved the teepee at this unfinished point as it hung off the ironing board.
f. Make the binding and rod pockets

Sew two of your binding pieces together, right sides together, with a diagonal stich (if holding the pieces as pictured above) from the bottom right corner to the top left corner. This will allow you to unfold the fabric into one straight line with the seam on the wrong side of the fabric. Repeat until all of your binding pieces are sewn together into one long snake. Trim off that little triangle that is left behind the seam on the wrong side of the fabric and iron the seams flat.
Repeat the above steps for your rod pocket pieces.
g. Iron the binding and rod pocket to prepare for sewing.

Binding: With the right side of your binding fabric facing down on your ironing board and the wrong side facing up toward you, iron both sides of your binding inward 5/8 of an inch. Basically, you are just bringing the sides of the snake in to touch in the middle.

Finish the seam of one end of the long snake (as pictured above). With the right side of the fabric down on your ironing board, fold one end of the snake in 1/4 inch and iron it flat. Fold the edge over onto itself again another 1/4 inch, iron flat, and sew along the inner folded edge. You are only finishing the seam as such on one end of your binding snake at this point.
After you have ironed the sides in and finished the seam on one end, fold the resulting long snake in half along that middle line where your raw edge of your fabric touched (what #3 refers to in the picture above) and iron it flat so the right side of the fabric is on the outside and the seam is sandwiched in the middle. You should be left with an approximately 5/8 inch wide long piece of fabric.
Rod pocket: With the right side of your fabric facing down, fold each edge inward 1/4 inch and iron down (as seen above). Your edges will NOT touch in the middle as they did for the binding. After you have ironed your edges in, measure every 50 inches and along the snake and cut. You should be left with four 50 inch long pieces of fabric. These are your rod pockets. On each rod pocket, finish one end in the same way as described above for the binding (fold under a quarter inch, iron flat, fold under another quarter inch, iron, sew along fold). You are only finishing the seam on ONE end of each rod pocket. We will finish the other end after we have made sure it fits the teepee correctly.
h. sew on your binding

Pin along the bottom edge of your teepee and along each panel seam line to keep the inner and outer fabrics of your teepee together and lined up. Lining up your finished end of the binding with one door, sandwich the bottom unfinished seam of your teepee in the binding as shown above and sew along the top edge of the binding, stopping a few inches before you finish and reach the other door. Line up the binding with bottom edge and cut it about a half to one inch past the door. You could iron and sew the end to finish the seam as you did before, but I just double fold the seam under, flatten it with my finger nail and finish sewing the binding the rest of the way around the teepee. Complete the binding by sewing the binding shut on either side of the door.
Finish one end of the remaining binding as you did previously. Starting with your finished end, sew the binding onto the raw edges around the top of the teepee in the same manner as you did for the bottom, again stoping a few inches before you finish. Line up the binding and cut about two inches beyond your start point. Fold under your end seam so that you have room to overlap and cover your beginning piece and finish your seam. You can finish the seam before sewing on the binding or double fold up your end, finish sewing up the binding and then sew up the folded end to finish.
i. sew on your rod pocket

Line up the finished end of one rod pocket with the bottom edge of the teepee along one of the panel seam lines. Roughly pin it into place so that you can eyeball where the rod pocket with meet the end of the teepee at the top. Mark that spot with a straight pin. Unpin the rod pocket from the teepee and cut the rod pocket one inch above your straight pin mark and finish that end (folding under 1/2 inch and then another 1/2 inch and sewing the fold close). Repin the rod pocket to the teepee lining up the bottom and top of the rod pocket with the bottom and top of the teepee along the panel seam line. Be careful to pin through both layers of the teepee and the rod pocket to avoid shifting of fabric during sewing. I also recommend placing several pins in the general area around where the pocket will be going to keep the layers of the teepee together and to avoid accidentally catching a layer in your seam when you don't want to. Sew along both sides of the rod pocket as close to the fold as you can securely get. Sew along the bottom rod pocket at the base of the teepee to close the pocket. DO NOT sew closed the end of the rod pocket at the top of the teepee or your teepee will fall over because the rods will have no where to go.
Repeat for the other three rod pockets.
j. Assemble!!!!!
Drill a hole 6 inches down from the top of each rod. Slide the rods into each pocket and set up the teepee. Use kitchen twine to tie the rods together by threading the twine through the hole and wrapping it around.
YAY!

3 comments:
dang those indians were no joke! genius' no doubt and so are you! now I just need to increase my I.Q. so that I can actually make this...if not, think about opening up a store and selling these things...ok?
freaking creative!
@Kelly, perhaps I made it sound more complicated than it is. I'm sure you could do it. Positive. I need to get better at this tutorial thing.
I just read all this and (after thinking "Joy is amazing!") thought, "Yes! I'm totally going to do this!" And then I considered how long it would take amateur me to make it and I felt a little discouraged...maybe a summer 2013 project? May I ask about how long it took you (in days or hours)...?
Nice job!
Post a Comment